Hello fellow simmers,
It has been some time since I last written any news, although the plugin is still maintained. I took some time off and the liberty to do other staff, but I always came back to the plugin and try to figure: "what needs to be fixed" or "what will make it simpler for me", yes, it always starts with myself when no one is asking for new features.
The latest updates were part of a mission I worked on and I ended up finding few bugs and needed features. But, in this topic I won't directly speak about the plugin but of a way to automate the text messages into "mp3" sound file so the will replace the default synthetic voice we hear in Windows, Mac or even Linux.
Python
Python Script to Download(v1.1)
If you follow my current web site, you are probably aware that I already wrote a "Perl" script to do the same (although I can't remember when I spoke about it), but I decided to re-visit the code and re-write it in Python. Other than that I also wanted to add some capabilities so the script will handle more options and be of value to the designer.
So what we send to the script:
Since I'm not sure I covered this topic before, here are some dependencies related to this script:
Once it is done you can run the python script.
It has been some time since I last written any news, although the plugin is still maintained. I took some time off and the liberty to do other staff, but I always came back to the plugin and try to figure: "what needs to be fixed" or "what will make it simpler for me", yes, it always starts with myself when no one is asking for new features.
The latest updates were part of a mission I worked on and I ended up finding few bugs and needed features. But, in this topic I won't directly speak about the plugin but of a way to automate the text messages into "mp3" sound file so the will replace the default synthetic voice we hear in Windows, Mac or even Linux.
Python
Python Script to Download(v1.1)
If you follow my current web site, you are probably aware that I already wrote a "Perl" script to do the same (although I can't remember when I spoke about it), but I decided to re-visit the code and re-write it in Python. Other than that I also wanted to add some capabilities so the script will handle more options and be of value to the designer.
So what we send to the script:
- You can send one file name to be parsed or
- Send a list of files or
- Define a file name pattern to filter files in a working folder.
- Last, you can also define a working folder, where all your files are located and needs to be parsed.
- Connect to Google Cloud and work with the "Text to Speech" engine to convert a text to an audible human voice like sound file in mp3 format.
- Every file that was created, it will modify the "in memory" XML information and will write it to the original folder but with the "{name}.new.xml" extension, so you can decide if to use it instead of the original file.
Since I'm not sure I covered this topic before, here are some dependencies related to this script:
- It was only tested in Linux. Windows will need few tweaks since there are few conversion programs that are part of the Linux distro and I don't think they are native to Windows.
- You must have a google cloud account, I think you also need to add a credit card if you exceed the minimal usage for the program you will pick (I think it is around 100000 characters or even more, so it is quite hard, in my use case, to pass this threshold).
- You have to install the Google SDK.
- As part of the SDK, your Google secret key must be set and be recognized in the environment.
- You need Python 3 to be installed.
Once it is done you can run the python script.
Here are some notes I wrote in the script, to remind me how to setup the GCloud account:
Main Script Files
text_to_speech.py - main Python script, and the only one you will need.
download_request.sh - This script is generated from the main python during each run.
The python script use this file to call the cURL command and interact with Google Cloud, the generated files will be written to the "output" folder.
These two files and folder are mandatory for the workflow to succeed.
Here are some few screen shots that describe the functionality and outcome of the script
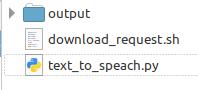
Here is an example where I placed the script in a folder.
The "download_request.sh" file is created from the "text_to_speech.py" script.
The "download_request.sh" file is created from the "text_to_speech.py" script.
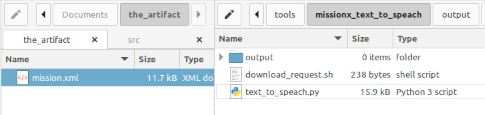
In the following screenshot you can see the folders I prepared for the scrip:
And here is the "after" script execution:
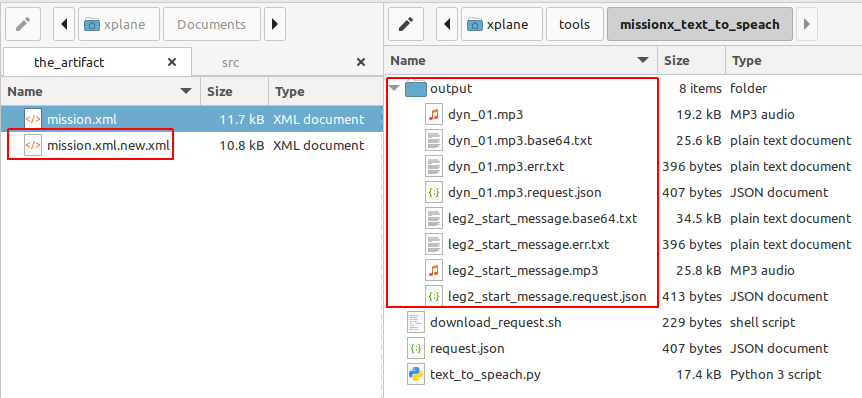
The command I used:
From the output structure in the image above, you can see that we have:
- A new file that was created with the file names and the ".new.xml" extension in it to make the life of the designer a little easier. You can use it or modify your original file with the file names in the "sound_file" attributes.
- The output folder holds the ".mp3" files and the log files.
If one or more files do not generate, you can check the "error" log files and fix the issue at hand.
Other Command Line Examples:
Remember that all ".mp3" files will be created in the "output" folder.
The script available options are:
The script available options are:
The script help output:
How the script works
The script does not have to receive a valid mission file, it can be a partial XML file content but the xml syntax in it must be valid.
The script will search all elements with tag name < message> and <dynamic_message>
Once it finds these elements it will parse one after the other and according to the element settings it will prepare a "JSON" file with the sound file characteristics.
Let's take a look at the following Message element:
Example to a <message> element:
You can see that the text track has few attributes that starts with "voice_xxx", these attributes are being used by the python script and allows the designer to prepare ahead of time the sound characteristics they want the file to have, for example: "voice_gender" define female or male voice. the "voice_name" defines the type of wave sound the synthetic voice will have (British accent or maybe Australian one ?).
Another useful attribute to tweak is the "voice_speak_rate" attribute, it will allow you to define a faster or slower speech speed, this is important for easier understanding of the voice over.
These attributes will be translated into a JSONrequest file for each message:
Another useful attribute to tweak is the "voice_speak_rate" attribute, it will allow you to define a faster or slower speech speed, this is important for easier understanding of the voice over.
These attributes will be translated into a JSONrequest file for each message:
You can see how the attributes are being mapped to the respective JSON values:
The last step is to send this information to Google Cloud and receive the output sound file (although in 64bit format it is still representation of the final sound file).
Here is an example for the modification the script does and writes to the "{file}.new.xml":
Here is an example for the modification the script does and writes to the "{file}.new.xml":
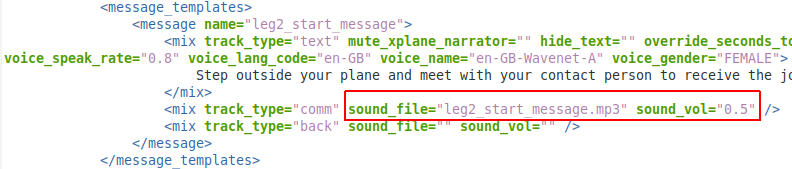
The script does not write to the original XML file.
 RSS Feed
