[v1.20] Tutorial 03 - Dynamic3D Objects
One of the sexiest features in mission-x v1.20 is the ability to dynamically load 3D objects, that compatible with the x-plane. But this is not the only option available, the other option is to create a route that will allow the object to move in x-plane "world" and the ability of the designer to treat it as a target in the objective.The current tutorial will deal with the following topics:
Please read the designer guide in conjunction with the tutorial itself.
For the current tutorial we will use a simple object that we need to place under "{X-Plane}/Custom Scenery/missionx/${tutorial}" directory.
Unzip the file into "/Custom Scenery/missionx", you should have a new directory by the name: "tutorial_03" with relevant objects/files.
- Introduction to <Obj3D>
- Preparations Tasks (what is needed to create a valid 3D Object)
- Add 3D Object to mission file.
- Introduction to <MoveObj3D> ( what it does, and what it don't do - not AI object, no DATAREF info on it )
- Defining a course of movement.
- Implement in Mission.
- Defining MoveObj3D as a Target.
- Implement in Mission file.
- Exercise.
- Final Words.
Please read the designer guide in conjunction with the tutorial itself.
For the current tutorial we will use a simple object that we need to place under "{X-Plane}/Custom Scenery/missionx/${tutorial}" directory.
Unzip the file into "/Custom Scenery/missionx", you should have a new directory by the name: "tutorial_03" with relevant objects/files.
| tutorial_03.zip |
Introduction to <Obj3D>
The <Obj3D> element is part of the <DynamicObjects> container. The Obj3D allow you to define a 3D object file to be load and place in a certain coordinate. the Obj3D should not be used to replace the OverlayEditor functionality, but as a complementary option. for example: we want to display a 3D object only when simmer reaches objective N. This is something I can not be synchronized with the OverlayEditor.
The main benefits I see in using Obj3D over OverlayEditor are:
The main benefits I see in using Obj3D over OverlayEditor are:
- Obj3D is placed wherever you want, no Mesh collision is being tested.
- Obj3D can be placed on all axes, include elevation.
- Obj3D allow to synchronize when to display it relative to a target and objective.
- Obj3D has the ability to switch file on event.
- Obj3D will not conflict with any scenery on your Custom scenery.
Preparations Tasks
Before Placing a 3D object, we need to gather the following info:
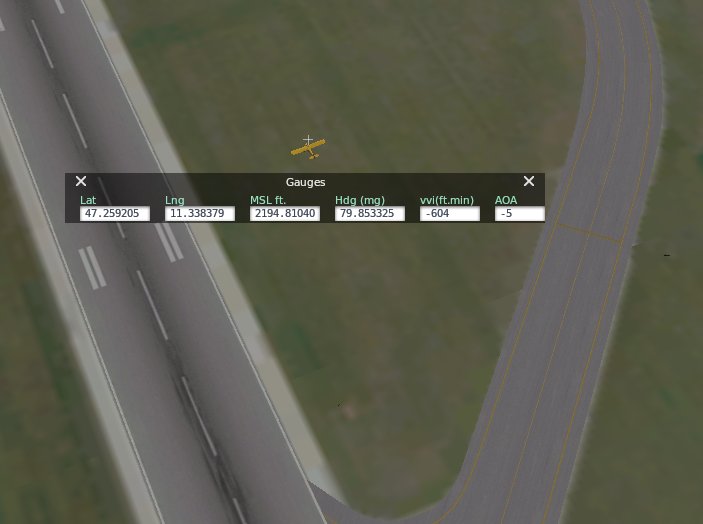
In previous tutorial I demonstrated how to get the coordinates of the plane using the Flight Gauge.
We can apply the same technique here.
- Location of 3D Object to display.
- When to display it and until when (if applicable)
- Create a directory under the "Custom Scenery/missionx" and
Place the 3D object file under this directory.
In previous tutorial I demonstrated how to get the coordinates of the plane using the Flight Gauge.
We can apply the same technique here.
The last thing we need, is when to display the 3D object.
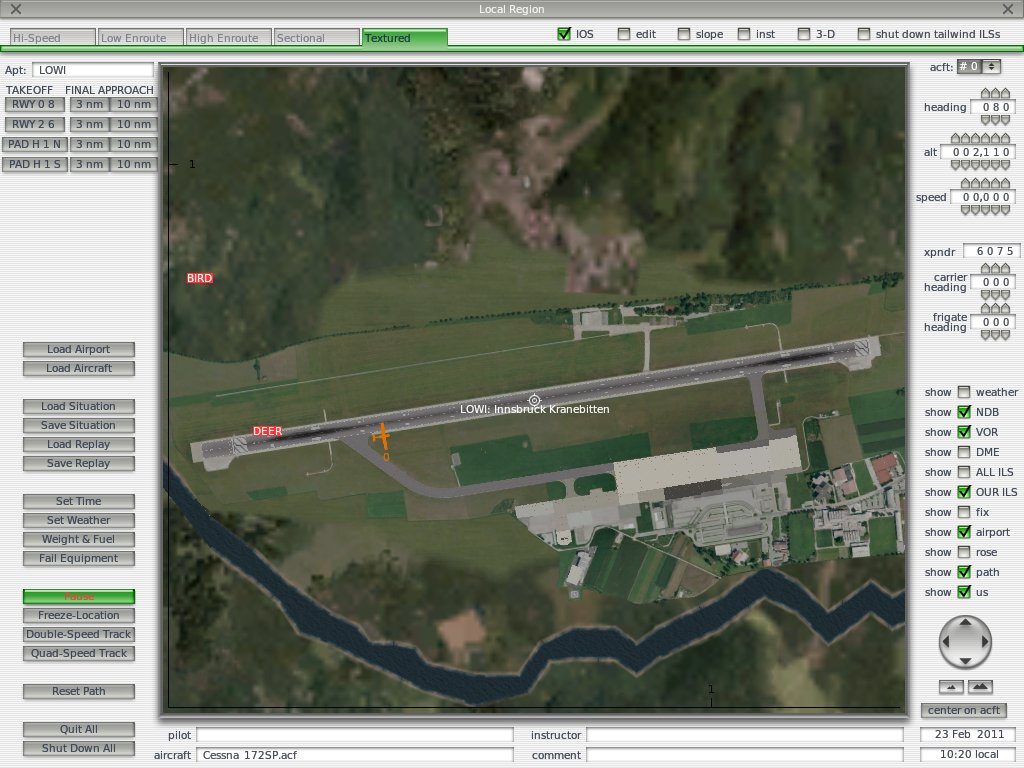
In the current tutorial, we will display the object on the right side of the runway, above the building horizon, when objective one starts.
In the current tutorial, we will display the object on the right side of the runway, above the building horizon, when objective one starts.
Adding 3D Object to Mission file
I will use the last tutorial as a starting point to add the 3D object.
<DynamicObjects dirName="tutorial_03">
<Obj3D id="1" fileName="Mark_red.obj" displayInObjId="1" immediateDisplay="1" distanceToDisplay="0"
lat="47.259125" long="11.338127" elev="2100" keepUntilObjectiveId="0" />
</DynamicObjects>
Snippet Notes:
The <DynamicObjects> element is a standalone one, we define it under <MISSION> element which is also the root element.
Its attribute "dirName" points to the directory where the plugin should search for the 3D object files.
The plugin construct a full path like: "{x-plane install}/Custom Scenery/missionx/{dirName}".
In the <Obj3D> element, I deliberately removed some of the non mandatory attributes, in order to keep focus on what is important.
In short, we defined:
The <Obj3D> has quite a lot of attributes, but they are necessary in order to position the 3D object correctly. The means to gather the needed info are quite easy and repeat from previous tutorials (like Flight Gauge).
It is time to test our 3D Object in X-Plane, but before that please go over this check list:
If all checks are OK, then we can test our 3D implementation.
The <DynamicObjects> element is a standalone one, we define it under <MISSION> element which is also the root element.
Its attribute "dirName" points to the directory where the plugin should search for the 3D object files.
The plugin construct a full path like: "{x-plane install}/Custom Scenery/missionx/{dirName}".
In the <Obj3D> element, I deliberately removed some of the non mandatory attributes, in order to keep focus on what is important.
In short, we defined:
- fileName: the 3d object file (case sensitive)., placed under "dirName".
- display rules: In which Objective to display - immediate display or when plane is N.nn knots from 3D object location.
- Coordinate info: latitude and longitude as well as elevation will position the object in x-plane "universe"
- keepUntilObjectiveId: When to hide the 3D object.
The <Obj3D> has quite a lot of attributes, but they are necessary in order to position the 3D object correctly. The means to gather the needed info are quite easy and repeat from previous tutorials (like Flight Gauge).
It is time to test our 3D Object in X-Plane, but before that please go over this check list:
- Have you created a directory to place the 3D Object.
- Does dirName has the same name as the directory you created.
- Have you placed the 3D Object file in the dirName directory.
If all checks are OK, then we can test our 3D implementation.
Example of the 3D Object hovering right of runway.
| tutorial03_v120_ex1.zip |
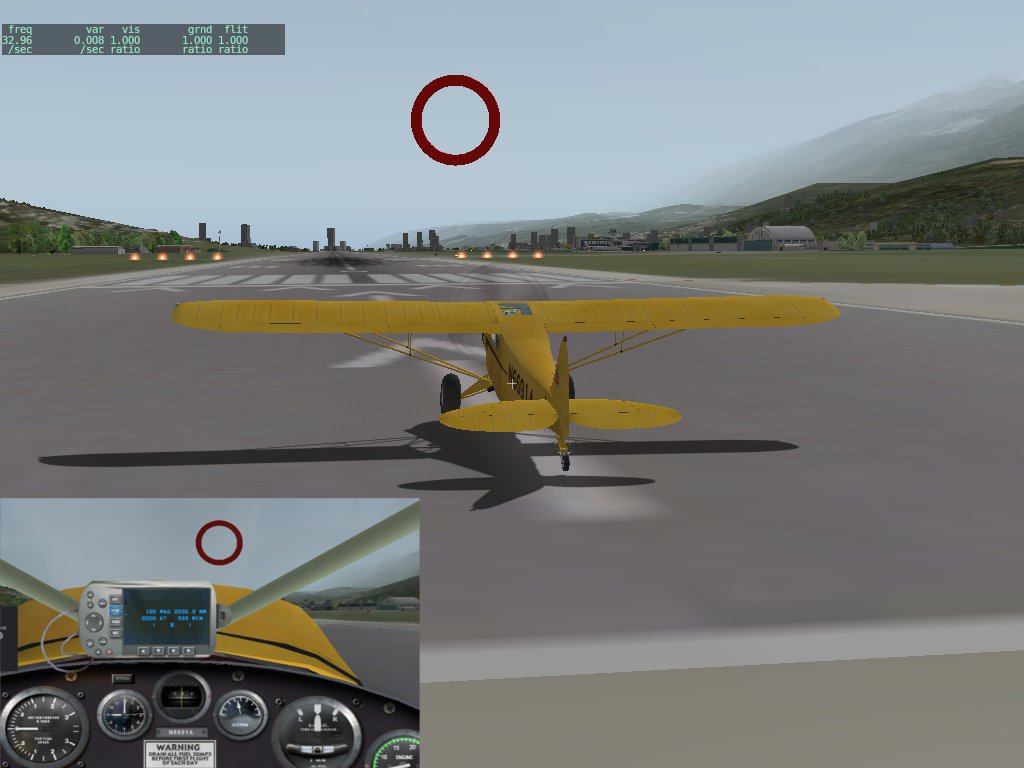
You should see the 3D Object hovering above the taxiway.
Our next step is to make the object move.
Our next step is to make the object move.
Introduction to <MoveObj3D>
Our 3D Object is sitting in its place, and it is time to give it a little shove.
MoveObj3D: extends the options that Obj3D introduced. It has the same attributes, but it anew in the movement department. The MoveObj3D has a path that we can define for it using a method we already used before and its the <Point> element.
MoveObj3D encapsulate in it a set of Points. These points describe the path the object needs to reach. The movement is linear between one point and another, but you can change the speed of its movement between points, elevation, roll, heading and pitch.
Before implementing a 3D Object that moves, lets gather the following info:
- Path of movement (set of coordinates/Points).
- Speed of movement between points.
- Any special attribute to change between points, like Heading, Pitch,Roll etc...
Defining a course of movement
For this tutorial, I'll create a circular path of points, just to demonstrate the effect.

Here are the path points I gathered:
It is time to implement the information in our Mission.
- 47.259125 / 11.338127 / 2205
- 47.260651 / 11.352057 / 2205
- 47.259445 / 11.352187 / 2205
- 47.258141 / 11.340660 / 2205
- 47.259125 / 11.338127 / 2205 ( back to starting location - important for circular path )
It is time to implement the information in our Mission.
---------------8<--------------------------------------------------------------------
<DynamicObjects dirName="tutorial_03">
<MoveObj3D id="1" fileName="torus_04.obj" cycle="1" displayInObjId="1" subTarget="0" immediateDisplay="1"
distanceToDisplay="0" keepUntilObjectiveId="0" >
<Point lat="47.259125" long="11.338127" elev="2100" speed="80.0" />
<Point lat="47.260651" long="11.352057" elev="2100" speed="80.0" />
<Point lat="47.259445" long="11.352187" elev="2100" speed="80.0" />
<Point lat="47.258141" long="11.340660" elev="2100" speed="80.0" />
<Point lat="47.259125" long="11.338127" elev="2100" speed="80.0" />
</MoveObj3D>
</DynamicObjects>
--------------->8--------------------------------------------------------------------
Lets go over the snippet of code and see the main differences with static Obj3D:
- MoveObj3D: new element name
- No Lat/Lon/Elev are needed for the MoveObj3D.
- We have a new attribute, by the name: cycle. Meaning: when reaching last point, should we continue from next point ?
A design issue: If we want a circular path, the last point should also be the first one. - Point element: encapsulated under MoveObj3D. These points describe the path and speed of movement.
| tutorial03_v120_ex2.zip |
Here is a bird like view, of how the movement should look like.
After loading a 3D Object and make it move, it is time to define it also as a target.
Defining MoveObj3D as a Target
In some cases you will want to relate to the moving object as a target. This represent the third kind of target - moving one.
The technique to convert our moving object to a target is done in two phases like the Area Target.
The technique to convert our moving object to a target is done in two phases like the Area Target.
- Under <Targets> Create a target of type <MoveObj3DTarget>, remember to define its groupId attribute.
- Under <MoveObj3D> modify "groupId" attribute and give it same groupId as the "MoveObj3DTarget" element.
Implement in Mission file
In order to test our Moving Target, we will use the already moving object 3D as a reference, and define a close tolerate distance so simmer need to reach near the target to complete it.
First Step: Define a moving target
<!-- First Objective: Fly over LOIK airport -->
<Objective id="1" >
<Targets>
<StaticTarget id="1" lat="47.564991" long="12.127969" elev="3000" needToLand="0" tolerateDistance="1" tolerateElev="3000" />
<MoveObj3DTarget id="2" groupId="201" lat="0" long="0" elev="0" needToLand="0" tolerateDistance="0.03" tolerateElev="50" />
</Targets>
Second Step: Link the MoveObj3D to the Moving Target:
<MoveObj3D id="2" fileName="torus_04.obj" groupId="201" cycle="1" displayInObjId="1" immediateDisplay="1"
distanceToDisplay="0" keepUntilObjectiveId="0" >
<Point lat="47.259125" long="11.338127" elev="2100" speed="160.0" />
<Point lat="47.260651" long="11.352057" elev="2100" speed="80.0" />
<Point lat="47.259445" long="11.352187" elev="2100" speed="160.0" />
<Point lat="47.258141" long="11.340660" elev="2100" speed="80.0" />
<Point lat="47.259125" long="11.338127" elev="2100" speed="80.0" />
</MoveObj3D>
| tutorial03_v120_ex3.zip |
It is time to test or moving target in x-plane.
Question: Your moving object is a mandatory target. How do you make it optional ?
Question: Your moving object is a mandatory target. How do you make it optional ?
Exercise
- Add a feedback, so when you are nearing the moving object ~0.8nm it will broadcast a simple message.
Use the subTarget, so Feedback will recognize the moving object. This attribute will be deprecated in the next build. - Define a moving object above LOIK airport with the following characteristics ( it should not be a target ):
* The path should be circular around the airport.
* Its height should be 500 feet above ground.
* It should loop until the end of the mission ( last objective ). - Lets go back to our second example of moving object. Try to use the other attributes (heading, pitch, roll) in order to create a nicer movement when the object is making a turn.
Hint: modify each intersect coordination so it will have 2 or 3 additional points, like start turn point and end turn point. Between them you should change the attributes to make the transition more smoothly.
I'll publish my proposal solutions soon....
Finishing Words
Here are some guidelines:
- The dynamic 3D object is a useful tool to enhance the mission itself. It allows you to add 3D Objects easily without special knowledge. What it should not be is a replacement to the "Overlay Editor". If you want a consistent 3D Object in the mission, it is like a scenery modification, therefore you should place the 3D Object using the scenery tool and not the plugin itself.
- Creating a moving target should not be taken lightly - it should be well coordinate with the story line and the objective should give enough hints of how to reach it.
